This
post describes one way communication of Active Directory users to be brought
into SharePoint 2013 environment.
We need an account set up for the AD profile
synchronization. Let’s call it “SharePointADSync“, we need to configure a
couple of things on this account in AD:
Add
“Replicate Directory Changes” permission
- On the domain controller, click Start, click Administrative
Tools, and then click Active Directory Users and Computers.
- In Active Directory Users and Computers, right-click
the domain, and then click Delegate Control.
- On the first page of the Delegation of Control Wizard,
click Next.
- In the Users or Groups page, click Add.
- Type the name of the synchronization account, and then
click OK.
- Click Next.
- In the Tasks to Delegate page, select Create a
custom task to delegate, and then click Next.
- On the Active Directory Object Type page, select This
folder, existing objects in this folder, and creation of new objects in this
folder, and then click Next.
- On the Permissions page, in the Permissions box,
select Replicate Directory Changes, and then click Next.
- Click Finish
Follow these steps now to import AD profiles to
SharePoint.
Go
to Central Admin. Click Manage Service applications under Application
Management.
From
the list of services, click on the User Profile Service Application
Under Synchronization, click Configure Synchronization
Settings
Select
the “Use SharePoint Active Directory Import” radio button under Synchronization
Options. Click OK to save settings. You will then be redirected to the User
Profile page.
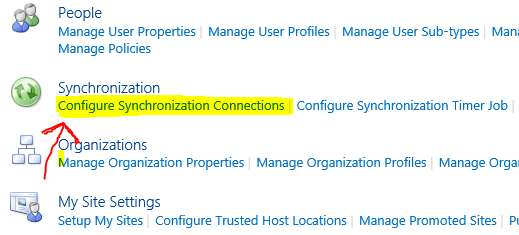
Under
Synchronization, click Configure Synchronization Connections and create a new
connection.
Fill
in appropriate values and click Populate Containers. Once the containers are
populated, check the ones you would like to import to SharePoint and save the
connection. In the Account name, enter the SharePointADSync account details that we have created for this purpose.
No
you can go ahead and do a full import, which will import the selected profiles
to your SharePoint.