Showing posts with label SharePoint 2013. Show all posts

Thursday, December 26, 2013

Customising Office 365 icon in SharePoint 2013

While implementing an Office 365 solution, I did some quick fixes to the system (mostly branding the site) which I would like to share in this post.

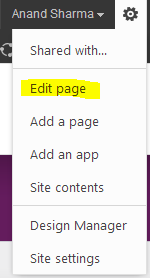
Hiding the Office 365 icon on the top left of the window

Add the following lines to the CSS file
.ms-core-brandingBox {display:none;}

Editing the Office 365 icon to custom icon

If you want to show your company logo instead, add the logo to your SharePoint site and refer it in the CSS like the following:

#suiteBrandingIconBox {background-image:url(image url location)!important;
background-color:transparent;background-position:top left;background-repeat:no-repeat;height:30px; }

Hiding the Show More on person.aspx

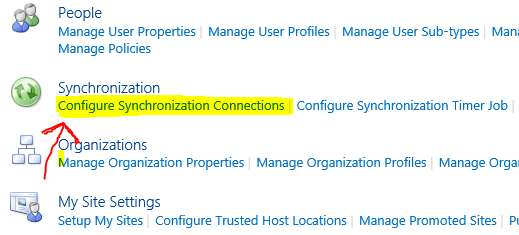
When you implement mysites within SharePoint 2013, on the person.aspx page, there are few information available for the person like Email Address, Office Phone, Mobile and so on. This webpart comes with a Jquery link Show More and Show Less which contracts and expands on click.
I had a requirement where I had to hide this button and expand the box always so that all the values are visible to the user at all times. Here is how I implemented the solution.

  • Find out the ID for the control by going to Developer tools within your browser.
  • Replace it after the # sign in the example below.
  • Add the whole snippet into Script Editor webpart on the person.aspx page


Wednesday, November 13, 2013

Override redirect using EditItemWithCheckoutAlert


On an edit item link, you want to perform some operation and redirect to a page of your choice, write a small script on your page and override the EditItemWithCheckoutAlert function.
So when you click on the edit link, the EditForm.aspx opens.


This allows you to modify the fields and delete the list item. Once you perform your desired action, the dialog box is closed and you are redirected to previous view/default view. To override this, use the script below, modify it to suit your URL and put it in a CEWP/Script Editor WP on your page.


Tuesday, October 29, 2013

Converting InfoPath data connections to UDCX files

While working with InfoPath 2013 and SharePoint 2013 on a Windows 2012 platform, I came across an issue where I was not able to convert the InfoPath data connections into UDCX files. I was getting the error below:

The specified location does not exist or could not be opened. Choose a data connection library on a server running Microsoft SharePoint Server and specify a valid filename.


After some read through, I found out that for this to be able to work, I would need a Windows feature installed on the server. This feature is Desktop Experience. Once I enabled this from the Server Manager, and restarted the server, I got rid of this error. Files were then getting converted to UDCX and were published to the Data Connection library.


Hope this helps someone.

Thursday, August 15, 2013

Resetting Sync databse within SharePoint

Resetting Sync database will delete the database completely with all the values in it.
I think one should reset the sync database as the last thing when all troubleshooting tricks provide no result. Only consider resetting when: 
  • Your import user profile connection is fetching details from AD but they cannot be seen on SharePoint
  • Similar scenario with export connections, so you want to push changes back to AD but you don’t see any changes on AD
  • You have modified settings on your FIM Client manually 

Here is a very nice article on resetting the sync database you should follow before considering a  reset:


PS: The User related information such as Profile Pictures, About Me etc. resides in Profile DB and the Social DB, these information will be safe as you do a reset of your Sync database

Wednesday, July 31, 2013

The tool was unable to install Application Server role. Web Server (IIS) role

While installing SharePoint 2013 onto Server 2012, I came across an error as “The tool was unable to install Application Server role. Web Server (IIS) role”. After browsing internet for resolution, I finally could resolve my issue. But while doing my investigation into the error, I came across posts where different people have tried different things to resolve the same error. I will try to collate those and post it in one single post.


Option 1 :
Go to Server Manager and click on Add Roles and Features
Select and expand Web Server (IIS) Role 
Select the IIS 6 Scripting tools under Management Tools within Web Server role
Click Next until the wizard finishes
Rerun the Pre-requisite setup and see if you have been able to resolve the error.

Option 2: (only for Windows 2008 R2)
Go to command prompt and run this command:

C:\Windows\Microsoft.NET\Framework64\v4.0.30319\aspnet_regiis.exe -i –enable

Option 3:
Run powershell with admin priviledges
Run the following commands: (I mounted my Server 2012 ISO on D drive)

Import-Module ServerManager
Add-WindowsFeature NET-WCF-HTTP-Activation45,NET-WCF-TCP-Activation45,NET-WCF-Pipe-Activation45
Add-WindowsFeature Net-Framework-Features,Web-Server,Web-WebServer,Web-Common-Http,Web-Static-Content,Web-Default-Doc,Web-Dir-Browsing,Web-Http-Errors,Web-App-Dev,Web-Asp-Net,Web-Net-Ext,Web-ISAPI-Ext,Web-ISAPI-Filter,Web-Health,Web-Http-Logging,Web-Log-Libraries,Web-Request-Monitor,Web-Http-Tracing,Web-Security,Web-Basic-Auth,Web-Windows-Auth,Web-Filtering,Web-Digest-Auth,Web-Performance,Web-Stat-Compression,Web-Dyn-Compression,Web-Mgmt-Tools,Web-Mgmt-Console,Web-Mgmt-Compat,Web-Metabase,Application-Server,AS-Web-Support,AS-TCP-Port-Sharing,AS-WAS-Support, AS-HTTP-Activation,AS-TCP-Activation,AS-Named-Pipes,AS-Net-Framework,WAS,WAS-Process-Model,WAS-NET-Environment,WAS-Config-APIs,Web-Lgcy-Scripting,Windows-Identity-Foundation,Server-Media-Foundation,Xps-Viewer -Source D:\Sources\sxs

Monday, July 29, 2013

InfoPath dropdown with different Value and Display Name

InfoPath dropdown comes with an ability to have different values being sent to the list/database and a different value to be viewed by users. For eg., you bind a dropdown which fetches users from a SharePoint security group and you want to display the “Display Name” attribute of the user within the dropdown values at the same time you want to map this field to a People picker field within the list and for that purpose you want to send the “Login Name” attribute to the people picker field. In such a scenario, follow the screenshots to create a similar functionality.

Click on the Dropdown properties

Select the datasource from the Data source dropdown or you can create one here as well. Then click on the Select XPath button (highlighted in the image).
In the Entries field, select the parent node and click OK.
This will enable you to select two different values for the Value and the Display Name field.
Now from the returning values, select the ones you want for each field and save your form.
To view your changes, you may want to publish the form and verify the changes.

Tuesday, June 18, 2013

Using JQuery to hide SharePoint 2013 List Item fields

Hiding unnecessary fields in DispForm.aspx/EditFOrm.aspx is something most of us implement within our SharePoint implementations. Here is a quick way to achieve that using JQuery.
Hiding any List Item fields
So you have many fields in your NewForm.aspx but you want to hide some like in the screenshot. I want to hide the fields I haven’t underlined.


I will click on Edit Page, and add a Script  Editor webpart on the page. From the below script, just change the number in which your fields appear on the page using a 0 index. So to hide the first field, enter 0, second field – enter 1 and so on.


Also you can do some formatting on your page using Jquery, for example I am making the font as BOLD for the list item entries.
$(".ms-formbody").css("font-weight","bold");

Also,
I want to hide the information in the screenshot, you can add this line as well.


$(".ms-descriptiontext").css("display","none");
Hope this helps someone looking for a similar scenario.

Thursday, May 30, 2013

Mapping custom Active Directory fields to SharePoint


Many at times, I have been asked about mapping custom properties from Active Directory to SharePoint User Profile. I decided to answer them via this post.

Mapping fields from Active directory to SharePoint is very simple and straight forward. We will see a step by step demonstration now.

Go to your User Profile Properties, click on Manage Properties and Add Property


Enter the Name, Display Name, Type and Length of the field you are trying to map across to SharePoint (These attributes are for the SharePoint front). After entering these fields, as you scroll down the page, you will see the section “Add New Mapping”

Select the source of your AD Import from the dropdown, if you have just one AD Import profile, you will see that selected by default. 

In the Attribute text field, enter the property name which is at the Active Directory side. Then click on Add. You will see the attribute is added in the Property Mapping for Synchronization section.

That’s it. You are done. 


Click on OK and run a full synchronization. 

You will see your property being pulled from AD to SharePoint.


Thursday, May 23, 2013

SharePoint 2013: Working with sp.js files and Publishing pages

So you are trying to write Javascript code in SharePoint 2013 and want to load the sp.js file before your custom function is called. And for that you have used.
ExecuteOrDelayUntilScriptLoaded(“your javascript function”, "sp.js");

But it’s not working. Sad, isn’t it ?
The reason is that, with SharePoint 2013 publishing pages the above syntax doesn’t work. You need to register using the below syntax
SP.SOD.executeFunc('sp.js', 'SP.ClientContext', “your javascript function”);

I struggled 2 hours to find this MSDN article which showed me the right way.


Wednesday, May 22, 2013

Retrieving SharePoint List Items using Javascript in a Custom Webpart


So you want to fetch list items but do not want any post back, yes we can implement that using Javascript within our custom webpart by using a client control. 

Let me explain that in a step by step process
  • Create a new Visual Webart Project in VS 2012.
  • Give it a proper name and make it a Farm level solution.
  • Now delete the existing Visual WebPart item within the solution (to remove the default name) and add a new item – Visual WebPart and give it the desired name.
  • Open ascx file and copy paste the code below
<%@ Assembly Name="$SharePoint.Project.AssemblyFullName$" %>
<%@ Assembly Name="Microsoft.Web.CommandUI, Version=15.0.0.0, Culture=neutral, PublicKeyToken=71e9bce111e9429c" %> 
<%@ Register Tagprefix="SharePoint" Namespace="Microsoft.SharePoint.WebControls" Assembly="Microsoft.SharePoint, Version=15.0.0.0, Culture=neutral, PublicKeyToken=71e9bce111e9429c" %> 
<%@ Register Tagprefix="Utilities" Namespace="Microsoft.SharePoint.Utilities" Assembly="Microsoft.SharePoint, Version=15.0.0.0, Culture=neutral, PublicKeyToken=71e9bce111e9429c" %>
<%@ Register Tagprefix="asp" Namespace="System.Web.UI" Assembly="System.Web.Extensions, Version=4.0.0.0, Culture=neutral, PublicKeyToken=31bf3856ad364e35" %>
<%@ Import Namespace="Microsoft.SharePoint" %> 
<%@ Register Tagprefix="WebPartPages" Namespace="Microsoft.SharePoint.WebPartPages" Assembly="Microsoft.SharePoint, Version=15.0.0.0, Culture=neutral, PublicKeyToken=71e9bce111e9429c" %>
<%@ Control Language="C#" AutoEventWireup="true" CodeBehind="VisualWebPart1.ascx.cs" Inherits="TestJavaScript1.VisualWebPart1.VisualWebPart1" %>

 Test 


Here I am using client control and not any server control so there will not be any post back experience.
If you wish you can add more functionality to this same webpart and use it in your real world scenario like adding server controls to it and then writing some code behind for it and so on.

Monday, April 22, 2013

UserProfileApplicationNotAvailableException_Logging error within SharePoint 2013

Recently while playing around with UserProfileManager, I came across a very strange issue where I couldn’t find much help on the internet. After some researching here and there, I finally found that the issue was just a permission issue. While trying to use UserProfileManager in my code, I was passing the SPServiceCOntext object to it and while creating an object of UPM, the error I was getting was

UserProfileApplicationNotAvailableException_Logging :: UserProfileApplicationProxy.ApplicationProperties ProfilePropertyCache does not have 607c1325-164c-4da5-8bd0-e28be323a06c

The resolution of this is to assign Full Control permission to the User Profile Service in Central Administration. In my case, it was my account and as I gave it full control, it ran smoothly. Follow the screenshots for details.
Navigate to Central Administration > Application Management > Manage Service Applications and select User Profile Service

Click on Permissions

Add the account which runs the designated code.

Hope this helps someone.

Friday, April 19, 2013

Importing Active Directory profiles to SharePoint 2013

This post describes one way communication of Active Directory users to be brought into SharePoint 2013 environment.
We need an account set up for the AD profile synchronization. Let’s call it “SharePointADSync“, we need to configure a couple of things on this account in AD:

Add “Replicate Directory Changes” permission
  • On the domain controller, click Start, click Administrative Tools, and then click Active Directory Users and Computers.
  • In Active Directory Users and Computers, right-click the domain, and then click Delegate Control.
  • On the first page of the Delegation of Control Wizard, click Next.
  • In the Users or Groups page, click Add.
  • Type the name of the synchronization account, and then click OK.
  • Click Next.
  • In the Tasks to Delegate page, select Create a custom task to delegate, and then click Next.
  • On the Active Directory Object Type page, select This folder, existing objects in this folder, and creation of new objects in this folder, and then click Next.
  • On the Permissions page, in the Permissions box, select Replicate Directory Changes, and then click Next.
  • Click Finish

Follow these steps now to import AD profiles to SharePoint.

Go to Central Admin. Click Manage Service applications under Application Management.

From the list of services, click on the User Profile Service Application
Under Synchronization, click Configure Synchronization Settings

Select the “Use SharePoint Active Directory Import” radio button under Synchronization Options. Click OK to save settings. You will then be redirected to the User Profile page.
Under Synchronization, click Configure Synchronization Connections and create a new connection.

Fill in appropriate values and click Populate Containers. Once the containers are populated, check the ones you would like to import to SharePoint and save the connection. In the Account name, enter the SharePointADSync account details that we have created for this purpose. 

No you can go ahead and do a full import, which will import the selected profiles to your SharePoint.

Wednesday, April 17, 2013

Edit Top Navigation Branding within SharePoint 2013


Changing the default SharePoint branding on SharePoint 2013 sites is something which I am sure all of us would want to do. You would prefer seeing your organization name rather than SharePoint on your intranet/internet sites. I am placing a screenshot so as you know what I am talking about.


While I was looking to implement the same thing, I did a bit of research and thought the newly introduced Design manager might have something. But unfortunately it doesn’t. Finally I managed to change this using CSS. However there is one another easy peezee way of doing the same thing by using powershell script.

$webApp = Get-SPWebApplication “http://WebAppURL”
$webApp.SuiteBarBrandingElementHtml = "SharePointClick"
$webApp.Update()


Tuesday, April 9, 2013

Step by Step Installation guide for SharePoint 2013


Installing SharePoint 2013 is very simple and almost same steps as we had followed when we installed SharePoint 2010. In this post I will explain step by step installation on a Stand Alone system used for trial or development purposes.
I have already installed Windows Server 2012 in my VM so I am good to go for my SharePoint 2013 installation.
Download the ISO for SharePoint and mount it. For mounting, just right click and say Mount.
Let us install the Pre-requisites first. Follow the screenshots below for clarity.

 Check the Accept checkbox and click Next
 Sit back and wait for the pre-requisites to be installed
 Click Finish and restart your system
 Once you restart the installer will continue and finish the installation. Then its time to double click the Setup.exe and start installing SharePoint 2013. The first thing you will see is that it will ask you to enter your Product Key. Enter the key and click on Continue.
 Once again it will ask you to accept to their terms which anyways we all have to.
Select the Server type, in my case I wanted a Stand Alone as I use this for development purposes. You can select your case and say Install Now. 
By default SharePoint will be installed in your C drive, I recommend you do not change it. However if that is one of your requirement, you can do it now in the File Location tab.
 Sit back, relax and wait for the installation to finish

Installation is complete now and you can now configure your SharePoint 2013


Finally, the installation is complete and now you will be asked to create the first SharePoint 2013 site and bingo, you have installed SharePoint 2013 successfully. You can now browse to the Central Admin and create Web applications, site collections and dive into the deep SharePoint sea.

Like us on Facebook for more SharePoint 2013 updates.

Thursday, April 4, 2013

Programatically breaking inheritance and adding unique permission to List Items


Permission handling is something which makes SharePoint a favorite product within the industry. SharePoint has Permission levels in built for basic roles, however you can create your own permission levels and assign to Groups and then set those groups to access any site/library/list. Whenever a sub-site is created, it asks you if you want to inherit the permission from the parent site or want to create unique permissions. 

If you choose to inherit the permissions, it will copy the same set of permissions to the sub-site which will again be passed on to the lists/libraries you create. It may happen that for securing our content, we want to break this inheritance and want to assign unique permissions to restrict the users for certain actions and to make the content more secure. Inheritance can be broken manually using the Out of feature also and if you have a business logic in place, you can do it programmatically also. This blog post gives you code to break inheritance for items meeting certain criteria and assigning permissions to them explicitly. I am using ItemAdded() event receiver to do this. You can use it within workflow or any custom webpart as well.

SPGroup securityGroup = spWeb.SiteGroups["Security Group Name"]; 
SPRoleDefinition groupRole = spWeb.RoleDefinitions["Read"]; 

SPRoleAssignment roleAssign = new SPRoleAssignment(securityGroup); 
roleAssign.RoleDefinitionBindings.Add(groupRole); 

SPListItem listItem = spWeb.GetListItem("http://List Item URL"); 
listItem.BreakRoleInheritance(true); 
listItem.RoleAssegnments.Add(roleAssignment); 
listItem.Update();

Monday, April 1, 2013

Creating Event Recievers within Visual Studio 2010

Event receivers can be broadly seen as of two types:

Asynchronous (triggered before finishing of previous event)
          ItemAdding, ItemUpdating
Synchronous (triggered after finishing the previous event)
          ItemAdded, ItemUpdated

Follow Steps to create an event receiver with Visual Studio 2010 and SharePoint 2010 :
  • Open up Visual Studio 2010 with administrator privileges
  • Click File > New > Project
  • Under Installed templates, click SharePoint and then select Event Receiver (C# in my case). Enter the name, storage location and Solution name in the text box provided and click on OK.
    • It will then ask you to specify the site and trust level or scope of your solution. If you want to deploy it across your farm so that all web applications can make use of it, you should select Deploy as Farm Solution. However, with event receivers, it is not usual so we will select Deploy as Sandboxed solution, which means it will only be accessible to the sites where we activate this feature.
    • Now it will ask you to select the type of Event Receiver you would like to create. In our case it would be List Item Events. Then select what item should be the event source, here we will select Document Library as we want to create an item in document library and want our event receiver logic to run after that. You may want to select Picture library or a list here or as per your business scenario.

    • Now, check the events you would want to code for within your receiver. For the sake of example, I will check An Item was Added which means it will automatically create a method stub for me with ItemAdded method. Now click on Finish.


    Our development IDE is ready to use now and you can see the method stub for ItemAdded being created already.

    Copy and Paste the code below to your solution.
    using (SPWeb web = properties.OpenWeb())
    {
        //Name is a metadata column within my document library
        //Checking if the Name field is equal to Test
        if (properties.ListItem["Name"] == "Test") 
        {//If it is
            // Populating the Title field with some value
            properties.ListItem["Title"] = "Event handler works"; 
            // Updating the ListItem to incorporate the change. 
            // Necessary step, without this  the changes are not pushed to ListItem
            properties.ListItem.Update(); 
        }
    
    }
    
    
    Some more useful methods which can be used are
    //Name of the Document Library
    string DocLibraryName = properties.ListTitle.ToString();
    
    //Getting the Item ID
    int ItemID = properties.ListItem.ID;
    
    //Collection of Role Assignments - required for controlling permission to the Item
    SPRoleAssignmentCollection roleAssignment = properties.ListItem.RoleAssignments;
    

    Build the solution and deploy it. Go to your SharePoint site and activate it(if not already activated) and create any document library and create an item with Name as Test and see your event receiver in action.

    This event receiver will fire on all the document libraries within your site where you have activated the feature, if this is not the intended behaviour, use
    if(properties.ListTitle.ToString() == "DocumentLibraryName")
    
    And write all your logic within your IF block.

    For any queries please feel free to email me. If this post helped you, please share it and benefit more and more fellow SharePoint developers

    Friday, March 15, 2013

    Resizing an Image for consistency in SharePoint

    While implementing intranet within our organization, we configure MySites within SharePoint, upload the user profiles from Active Directory and give users the ability to upload their own picture. Also, while implementing any News, or any company information, updates on the home page of Intranet, we tend to put pictures beside the text we write. Now, the image for several notifications can be of several size if you don’t have an in-house designer who trims/resizes your pictures to be uploaded to SharePoint. So, here comes my solution to resize images as we upload them to a definitive size which can then be uploaded and shown to users on the SharePoint.

    I have created Synchronous event receiver to my Notification list where I am adding the image and the code resizes the image and uploads it to the list for a nice and consistent look and feel of your website.

    Copy and paste the code below into your ItemAdded method.

           public override void ItemAdded(SPItemEventProperties properties)
           {
               int _imageWidth = 0;
               int _imageHeight = 0;
    
               if (properties.ListTitle.ToLower().Equals("intranet pictures"))
               {
                   try
                   {
                       string _width = properties.ListItem.File.Properties["vti_lastwidth"].ToString();
                       string _height = properties.ListItem.File.Properties["vti_lastheight"].ToString();
    
                       if (Int32.TryParse(_width, out _imageWidth) && Int32.TryParse(_height, out _imageHeight))
                       {
                           //checking if the image height and weight is 120 (for the sake of example)
                           if (_imageWidth != 120 || _imageHeight != 120)
                           {
                               SPFile _imageFile = properties.ListItem.File;
    
                               MemoryStream _inputStream = new MemoryStream(_imageFile.OpenBinary(), true);
                               MemoryStream _outputStream = new MemoryStream();
    
                               Image _resizedImage = Image.FromStream(_inputStream).GetThumbnailImage(120, Int32.Parse(_height), null, IntPtr.Zero);
                               _resizedImage.Save(_outputStream, System.Drawing.Imaging.ImageFormat.Jpeg);
    
                               _imageFile.SaveBinary(_outputStream, false);                          
    
                           }
                       }
                   }
                   catch (Exception ex)
                   {
                       properties.ListItem.Delete();
                       properties.Status = SPEventReceiverStatus.CancelWithRedirectUrl;
                       //You can give the location of your custom error page here
                       properties.RedirectUrl = "/_layouts/Intranet_PictureRestrict/IntranetPicError.aspx";                   
                   }
               }
           }
    
    Let me know if you want to customize it more or have any queries.

    Wednesday, March 13, 2013

    SharePoint 2013 : Introduction to Event Receivers


    I installed the beta version of SharePoint 2013 recently and played around with it. The first impression I had after creating team sites and community sites was “WOW, it looks amazing”. I guess that’s how you react every time you see a new offering of SharePoint J
    This is my first post on SharePoint 2013; dedicated to something I use the most within SharePoint implementations, the Event Receivers.

    As SharePoint 2013 offers App development as part of Office 365 development suite, which also replaces the traditional sandboxed solutions available in SharePoint 2010, it becomes very easy to create apps and maintain them within SharePoint 2013.

    Event receivers are somewhat modified for SharePoint 2013 into two parts, namely 
    • Remote event receivers and
    • App Event receivers 
    I will write separately about how to create both of these event receivers in my future posts. In this blog I will explain what they are and how they can be used to suit our business needs.

    Remote Event Receivers

    These event receivers signify events that occur on items within any list or library. Say addition of an item, update of an item or deletion of an item. They can be synchronous and asynchronous in nature. Microsoft has modified a bit in this version of SharePoint, the way we deal this nature of event receivers. We will see it how later in this post.

    App Event Receivers

    These event receivers signify the events that occur to the app we are creating. Say app installation, app uninstalling or app upgrading.

    As we create a new remote event receiver or app event receiver in Visual Studio 2012, we need a web application where we would be deploying our app. By default the scope of the app will be the host web application mentioned. A web service is added to this web application to handle the events which contains two methods

    ProcessEvent()
    Handles events that occur before an action occurs, such as when a user adds or deletes a list item

    ProcessOneWayEvent().ProcessEvent()
    Handles events that occur after an action occurs, such as after a user adds an item to a list or deletes an item from a list

    Like in SharePoint 2010, we had synchronous and asynchronous event receivers, in 2013; we have these two methods which deals with the nature of the event receivers.

    Many other things remains same the way we used to deal with them in SharePoint 2010 and VS 2010 environment like adding more events within your event receiver solution, changing the event receiver to point to either Document Library or an Announcement list and so on.

    I will write more as and when I try new things within SharePoint 2013.